Face cleaning brushes have revolutionized skincare routines, offering a deeper cleanse than traditional hand washing. If you’ve just purchased your first facial cleansing brush or are considering getting one, this comprehensive guide will teach you exactly how to use it for optimal results.

What is a Face Cleaning Brush?
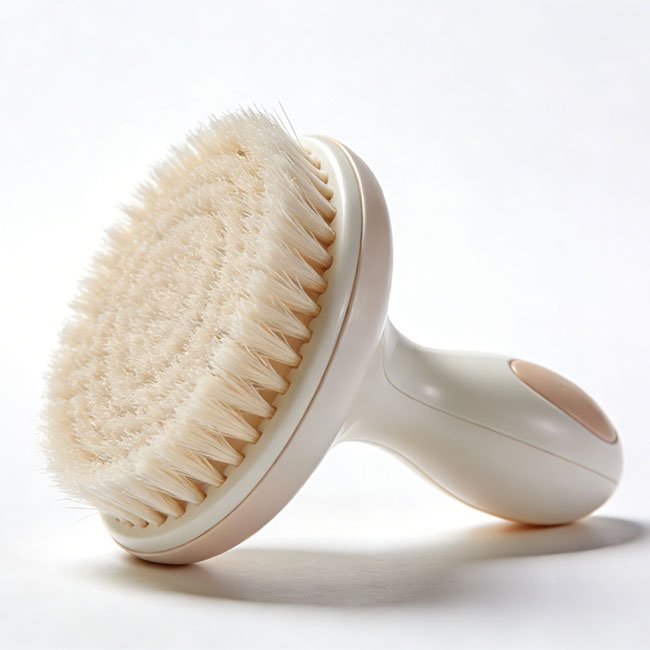
A face cleaning brush is a skincare device designed to deep clean your pores using rotating, vibrating, or sonic technology. These brushes come in two main types:
- Manual face brushes: Handheld brushes you control manually
- Electric face brushes: Battery-powered devices with automatic rotation or vibration
According to dermatological studies, face cleaning brushes can remove up to 6 times more makeup and dirt compared to cleansing with hands alone.
Why Proper Usage Matters
Using a face cleaning brush incorrectly can lead to:
- Skin irritation and redness
- Over-exfoliation
- Broken capillaries
- Increased breakouts
However, when used correctly, face brushes deliver remarkable benefits including clearer pores, smoother texture, and better product absorption.
Step-by-Step Guide: How to Use a Face Cleaning Brush
Step 1: Prepare Your Skin
What to do:
- Remove any makeup with a makeup remover first
- Wet your face with lukewarm water (not hot)
- Ensure your face is thoroughly damp
Why it matters: Dry brushing can cause friction and irritation. Lukewarm water opens pores gently without causing inflammation.
Step 2: Apply Your Cleanser
What to do:
- Apply a small amount of gentle, pH-balanced cleanser to your face
- Alternatively, apply cleanser directly to the dampened brush head
- Use a pea-sized amount – less is more
Pro tip: Avoid harsh cleansers with exfoliating beads, as the brush already provides mechanical exfoliation.
Best cleansers to use with face brushes:
- Gel cleansers for oily skin
- Cream cleansers for dry skin
- Foam cleansers for combination skin
- Micellar water-based cleansers for sensitive skin
Step 3: Turn On Your Device (Electric Brushes)
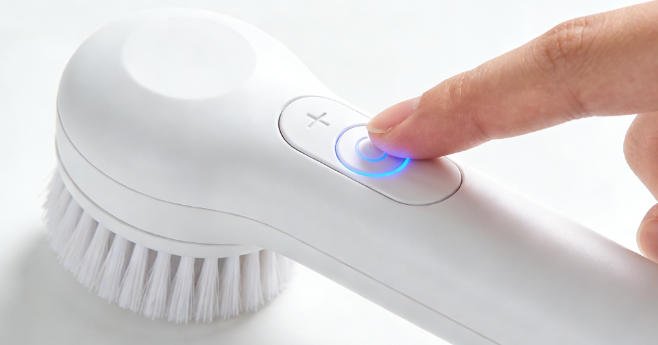
What to do:
- Power on your electric face brush
- Start with the lowest speed setting if you’re a beginner
- Familiarize yourself with the timer function (most have 60-second timers)
For manual brushes: Skip this step and proceed to the technique section.
Step 4: Use Gentle Circular Motions
Proper technique:
- Forehead (15 seconds)
- Start at the center of your forehead
- Move in small, gentle circular motions
- Work outward toward your temples
- Let the brush do the work – don’t apply pressure
- Nose and T-Zone (15 seconds)
- Focus on the sides of your nose where oil accumulates
- Use gentle upward strokes on the bridge
- Pay attention to the area between your eyebrows
- Cheeks (15 seconds each side)
- Start at your nose and work outward
- Move in upward circular motions
- Cover the entire cheek area including near the hairline
- Chin and Jawline (15 seconds)
- Clean along the jawline with upward strokes
- Focus on the chin where breakouts commonly occur
- Don’t forget the area under your chin
Total time: 60 seconds (some devices have 90-second modes for more thorough cleansing)
Step 5: Avoid Sensitive Areas
Areas to AVOID:
- Directly on active acne or open wounds
- The delicate eye area (under eyes, eyelids)
- Lips and the immediate surrounding area
- Any areas with broken skin or irritation
Why: These areas have thinner, more sensitive skin that can be easily damaged by mechanical cleansing.
Step 6: Rinse Thoroughly
What to do:
- Rinse your face with cool water
- Ensure all cleanser is removed
- Pat (don’t rub) your face dry with a clean towel
- Immediately clean your brush head (see Step 7)
Pro tip: Cool water helps close pores and calm the skin after cleansing.
Step 7: Clean Your Brush Head

Immediate cleaning:
- Rinse the brush head under running water
- Remove any visible residue
- Gently shake off excess water
- Store upright in a well-ventilated area
Why it’s crucial: Bacteria can multiply on damp brush heads within hours, leading to breakouts and infections.
How Often Should You Use a Face Cleaning Brush?
The ideal frequency depends on your skin type:
| Skin Type | Recommended Frequency |
|---|---|
| Oily skin | Twice daily (morning and night) |
| Normal skin | Once or twice daily |
| Dry skin | Once daily or every other day |
| Sensitive skin | 2-3 times per week |
| Combination skin | Once daily, focusing on oily zones |
Important: Start with 2-3 times per week regardless of skin type, then gradually increase as your skin adjusts.
Best Practices for Face Cleaning Brush Use
1. Let the Brush Do the Work
- Don’t: Press hard or scrub vigorously
- Do: Use light, feather-like pressure
- The device’s motion provides the cleansing power
2. Keep It Moving
- Never hold the brush in one spot for more than 2-3 seconds
- Continuous movement prevents over-exfoliation
- Follow the timer if your device has one
3. Use the Right Brush Head
- Soft bristles: For sensitive or dry skin
- Medium bristles: For normal to combination skin
- Firm bristles: For oily or acne-prone skin (use cautiously)
- Silicone: For very sensitive skin or daily use
4. Replace Brush Heads Regularly
- Replace every 3 months minimum
- Replace sooner if bristles look worn or splayed
- Mark your calendar to remember
5. Charge or Replace Batteries
- Keep electric brushes fully charged
- Low battery = reduced effectiveness
- Replace batteries in manual electric brushes as needed
Common Mistakes to Avoid
❌ Mistake #1: Using Too Much Pressure
The problem: Causes micro-tears, redness, and irritation
The solution: Hold the brush lightly against your skin. If you see your skin moving significantly, you’re pressing too hard.
❌ Mistake #2: Overusing the Device
The problem: Strips natural oils, damages skin barrier
The solution: Follow the frequency guidelines for your skin type. More is not better.
❌ Mistake #3: Not Cleaning the Brush Head
The problem: Bacteria buildup leads to breakouts
The solution: Rinse after every use, deep clean weekly, replace every 3 months.
❌ Mistake #4: Using with Harsh Products
The problem: Double exfoliation causes irritation
The solution: Avoid using with:
- Physical exfoliants (scrubs with beads)
- Strong chemical exfoliants (high-concentration AHAs/BHAs)
- Retinol products (use separately)
❌ Mistake #5: Sharing Your Brush
The problem: Transfers bacteria and skin conditions
The solution: Never share your face brush, even with family members.
❌ Mistake #6: Using on Dry Skin
The problem: Causes friction and irritation
The solution: Always wet your face first before using the brush.
What to Do After Using Your Face Brush
Immediate Post-Cleansing Routine:
1. Apply Toner (Optional)
- Use a hydrating or balancing toner
- Helps restore pH balance
- Prepares skin for serums
2. Apply Serum
- Your skin is primed for maximum absorption
- Vitamin C serums work great in the morning
- Hyaluronic acid for hydration
3. Moisturize
- Lock in hydration immediately
- Use a moisturizer appropriate for your skin type
- Don’t skip this step, even with oily skin
4. Apply SPF (Morning Only)
- Always use sunscreen during the day
- Minimum SPF 30
- Freshly cleansed skin is more vulnerable to UV damage
Troubleshooting Common Issues
Issue: Skin Feels Tight or Dry
Causes:
- Overuse
- Too much pressure
- Harsh cleanser
Solutions:
- Reduce frequency to every other day
- Use a gentler cleanser
- Apply a richer moisturizer
- Consider switching to a softer brush head
Issue: Increased Breakouts
Causes:
- Dirty brush head
- Purging phase (temporary, first 2-4 weeks)
- Overuse causing irritation
Solutions:
- Deep clean your brush head
- If it’s purging, continue for 4 weeks
- If breakouts worsen after 4 weeks, reduce frequency
- Consult a dermatologist if persistent
Issue: Redness or Irritation
Causes:
- Too much pressure
- Using too frequently
- Sensitive skin reaction
Solutions:
- Take a break for 3-5 days
- Resume with lighter pressure
- Reduce to 2-3 times per week
- Switch to a silicone brush head
Issue: Device Not Working Properly
Causes:
- Low battery
- Water damage (if not waterproof)
- Worn motor
Solutions:
- Charge fully or replace batteries
- Check waterproof rating
- Contact manufacturer if under warranty
Face Cleaning Brush Tips for Different Skin Types
For Oily Skin:
- Use twice daily for best results
- Focus on T-zone where oil accumulates
- Pair with a gel or foaming cleanser
- Consider a brush with firmer bristles
For Dry Skin:
- Use once daily or every other day
- Choose a soft bristle or silicone brush
- Use with a creamy, hydrating cleanser
- Follow immediately with rich moisturizer
For Sensitive Skin:
- Start with 2-3 times per week
- Always use the lowest speed setting
- Choose silicone brush heads
- Use fragrance-free, gentle cleansers
- Watch for any signs of irritation
For Combination Skin:
- Use once daily
- Spend more time on oily areas (T-zone)
- Lighter touch on dry areas (cheeks)
- Consider using different brush heads for different zones
For Acne-Prone Skin:
- Use 4-5 times per week
- Avoid active breakouts and cystic acne
- Use with salicylic acid cleanser (low concentration)
- Clean brush head thoroughly after each use
- Replace brush heads more frequently (every 2 months)
Expert Tips from Dermatologists
Dr. Sarah Johnson, Board-Certified Dermatologist:
“The key to successful face brush use is consistency and gentleness. I recommend patients start slowly – just 2-3 times per week – and gradually increase. The brush should glide across your skin, not scrub it.”
Dr. Michael Chen, Skincare Specialist:
“One of the biggest mistakes I see is patients using their face brush with active acne treatments like retinol or high-strength acids. This double exfoliation can severely damage the skin barrier. Use your brush with a simple, gentle cleanser only.”
Key Takeaways from Professionals:
- Less pressure = better results
- Consistency matters more than intensity
- Clean brush heads prevent 90% of brush-related breakouts
- Not everyone needs a face brush – hands work fine for many people
When to Use Your Face Cleaning Brush
Morning Routine:
Best for: Removing overnight oil buildup and preparing skin for makeup
Timing: After waking up, before applying skincare products
Duration: 60 seconds
Follow with: Toner, vitamin C serum, moisturizer, SPF
Evening Routine:
Best for: Deep cleaning after a full day of makeup, pollution, and oil
Timing: After removing makeup, before nighttime skincare
Duration: 60-90 seconds (can be slightly longer than morning)
Follow with: Toner, treatment serums, night cream
Pre-Mask Treatment:
Using your face brush before applying a face mask enhances absorption:
- Cleanse with brush
- Apply mask immediately
- Skin is primed for maximum ingredient penetration
Face Cleaning Brush Do’s and Don’ts
✅ DO:
- Wet your face before using
- Use gentle, circular motions
- Clean your brush after every use
- Replace brush heads every 3 months
- Start with low speed/frequency
- Use with a gentle cleanser
- Pat skin dry after rinsing
- Store brush in a dry, ventilated area
❌ DON’T:
- Use on dry skin
- Press hard or scrub
- Use on active acne or wounds
- Share your brush with others
- Use with harsh exfoliants
- Leave brush head wet in closed container
- Use more than twice daily
- Ignore signs of irritation
Maximizing Your Results
Week 1-2: Adjustment Phase
- Start with 2-3 uses per week
- Monitor skin’s response
- Expect slight tingling (normal)
- May experience minor purging
Week 3-4: Building Tolerance
- Increase to 4-5 times per week if tolerated
- Skin should feel smoother
- Pores may appear smaller
- Makeup application improves
Month 2+: Maintenance Phase
- Establish your ideal frequency
- Notice improved skin texture
- Better product absorption
- Consistent, clear complexion
Frequently Asked Questions
Q: Can I use a face cleaning brush every day?
A: Yes, if you have normal to oily skin and use gentle pressure. Dry or sensitive skin types should limit use to every other day or 2-3 times per week.
Q: Should I use my face brush in the shower?
A: If your device is waterproof, yes! The shower is convenient and the steam helps open pores. Just ensure it’s rated for water exposure.
Q: Can I use my face brush with any cleanser?
A: Use gentle, non-exfoliating cleansers. Avoid products with beads, high-concentration acids, or retinol when using your brush.
Q: How long until I see results?
A: Most people notice smoother skin within 1-2 weeks. Significant improvements in pore size and clarity typically appear after 4-6 weeks of consistent use.
Q: Is it normal for my skin to break out when I first start?
A: Yes, “purging” is common in the first 2-4 weeks as the brush brings impurities to the surface. If breakouts continue beyond 4 weeks, reduce frequency or consult a dermatologist.
Conclusion
Using a face cleaning brush correctly can transform your skincare routine, delivering professional-level cleansing at home. Remember these key points:
- Always wet your face first before using the brush
- Use gentle pressure – let the device do the work
- Keep it moving in circular motions for 60 seconds total
- Clean your brush head after every single use
- Start slowly and increase frequency as your skin adjusts
- Listen to your skin – reduce use if you experience irritation
With proper technique and consistent use, you’ll enjoy clearer pores, smoother texture, and a radiant complexion. Your face cleaning brush is an investment in your skin’s health – use it wisely, and it will reward you with beautiful results.
Last updated: February 17, 2026
Medical review: Board-certified dermatologists
Reading time: 12 minutes
Disclaimer: This article is for informational purposes only and does not constitute medical advice. Always consult with a dermatologist before starting any new skincare routine, especially if you have skin conditions like rosacea, eczema, or severe acne.
All Comments 0
Please log in to post a comment.
No comments yet. Be the first to share your thoughts!